The best thing about making costumes is discovering new techniques! The other day, I stumbled upon a tutorial from Urban Threads about using craft foam to add texture and depth to machine-embroidered designs. The tutorial (that you can find here) was for a specific embroidery design, but it did made me curious about the possibilities of using craft foam for embroidery. I asked myself: where else could I use craft foam in combination with machine embroidery? Craft foam is easy to sew, all cosplayers know that.
When I started planning my new Élise de la Serre cosplay, I knew one thing for sure: I didn’t want to make the red sash plates with Worbla like for all the other ones I made. While they don’t end up being that heavy, they do have a tendency to hit each other when you walk, incurring damage over time. I wanted a sash that would be more durable, less prone to damage and lighter. And then I thought: why not embroider the design at the end of the sash instead? I haven’t seen many cosplayers using embroidery for the sash, so that would make me stand out a little 😉 I first found an embroidered frame appliqué I liked, and combined with the Templar cross embroidery file I already had, I was good to go!
The first sash plates I made were with embossed metal sheets, and I really loved the embossed effect, on top of the plates being very light. Unfortunately, the metal plates were too pliable and I eventually removed them altogether. Today, I had a brain wave: how about using craft foam in combination with my appliqué contrast fabric, in order to add some depth to the design and mimic the embossed metal? BINGO!
I do not pretend to hold the truth and nothing but the truth about the technique I’ll explain below, but here’s how I made my new sash:
1. Choose your appliqué design(s) for your machine, and gather your contrast fabric, your main fabric, your craft foam (I used 1mm because that’s what I had at hand, but the thicker, the bigger the embossed effect!), your embroidery thread(s). Also, do not skip on a super important tool: temporary adhesive spray. I cannot embroider without it anymore!

2. (You can skip the references to centering in this step if your machine is always perfectly centered, but mine isn’t.) Mark your center. Spray adhesive to your stabilizer, and place the fabric on top of it. Press to have the layers nicely flat. Then, hoop your fabric + stabilizer, and attach your hoop to your machine. Since my machine isn’t precise, I first double-check the centering of my needle vs my hoop before anything else!
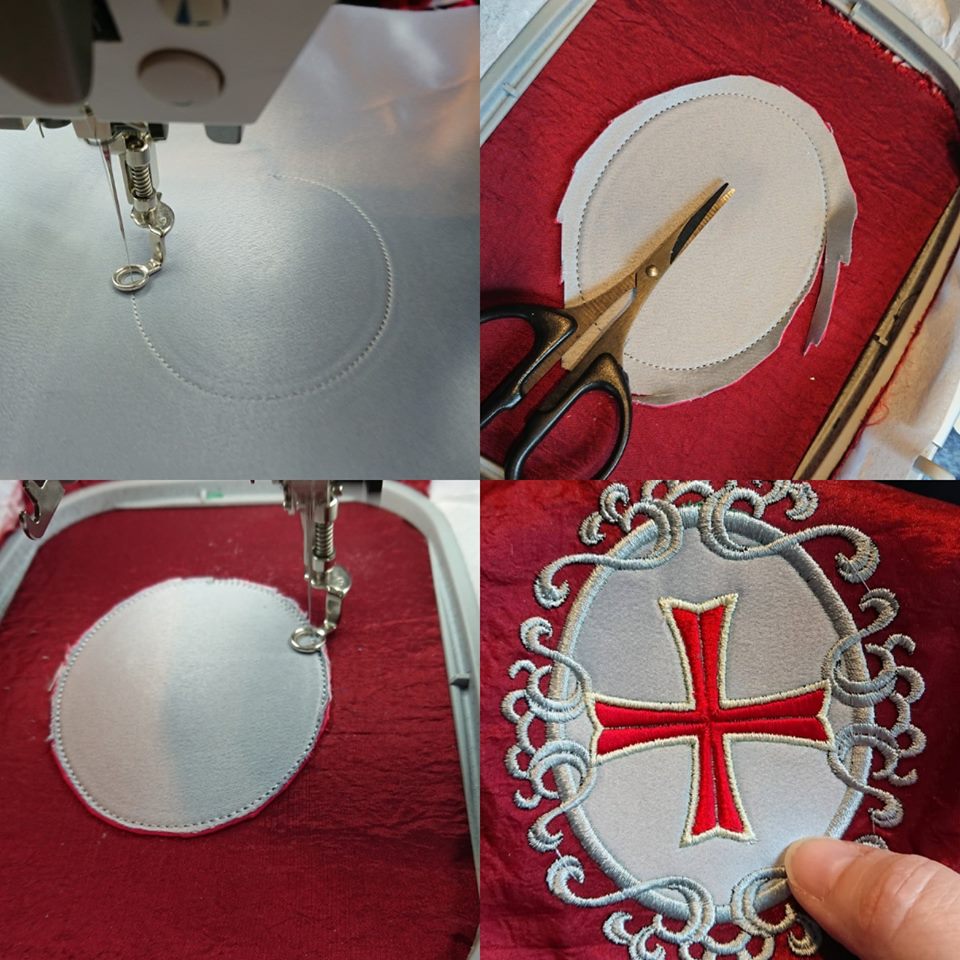
3. Spray adhesive to the back of your craft foam, and place the foam on top of your fabric. No need to attach the foam, the adhesive will hold it in place. Repeat the process for your contrast appliqué fabric, and then press well both layers on top of your hooped fabric + stabilizer.
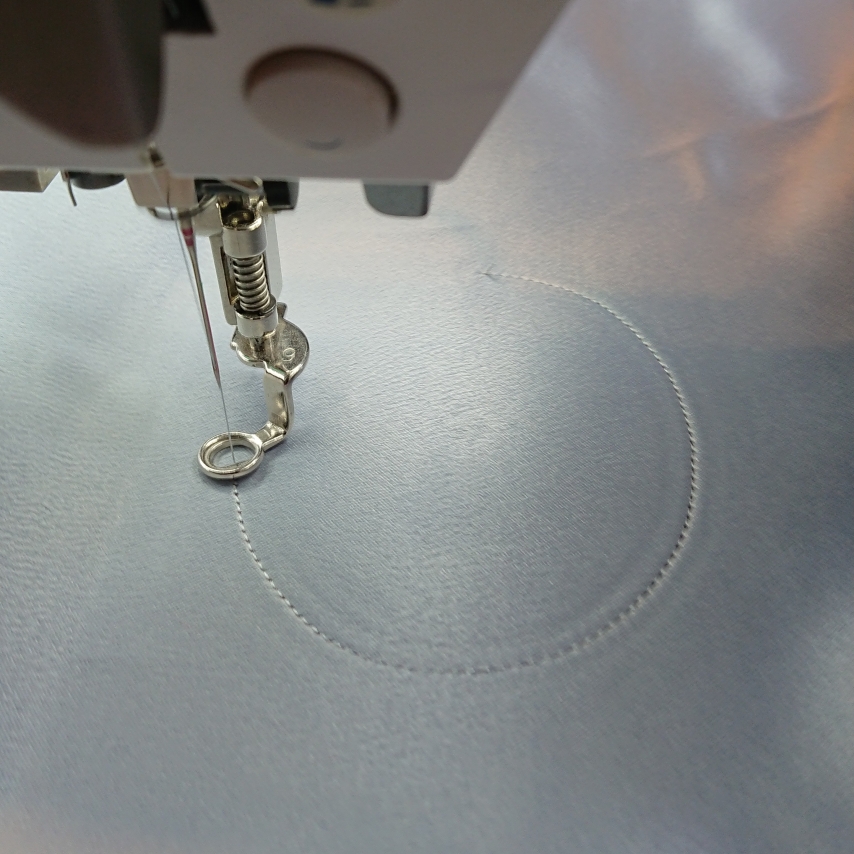
4. Start your appliqué design in your embroidery software. In my case, my machine does a large oval with a straight stitch.

5. Detach the hoop from your machine. DO NOT UN-HOOP YOUR FABRIC! With scissors, carefully cut away the foam and the contrast fabric as close as you can from the stitching. Tip: I usually I cut off most of the excess with big scissors, then cut off close to the stitching with a pair of scissors that are sharp but without pointy ends – as the pointy ends would dig into my fabric and make holes. This is a fiddly process, try not to pull too much on the foam and fabric as this might pull your main fabric out of the hoop or make the hooping less ‘tight’.
6. Re-attach your hoop to your machine, and continue embroidering your design until you’re done!
7. And here’s the final embroidered result! The sash ends are much lighter than with Worbla plates, yet the addition of craft foam gives them more body and a tad more weight. I’m sure using thicker foam, like 2mm or even 3mm foam, would give a more pronounced effect. I’ll be sure to experiment some more later!

I hope you enjoyed this tutorial and found it useful! Don’t hesitate to share it!
Do you have ideas for tutorials? Let me know! 🙂 I’d love to hear from you!


You must be logged in to post a comment.